I got so many compliments on my homemade costume that I simply had to share.
Last year I was unable to find a Halloween costume that really excited me so decided to be adventurous and make my own. I ran across Instructables.com which is a site where people share things that they make and I found a headless bride costume with very thorough instructions and knew I had to give it a try.
Step # 1 - Buy/Gather Materials
Rolls of Duct Tape (2 should be plenty)
Old Tight-Fitting Shirt
Old Tight-Fitting Shirt
Wedding Dress (I got mine off of eBay)
Materials for paper mache (I used flour, water, and newspaper strips)
Paint - white, peach, and red
Small Backpack
2-3 Yardsticks or Wooden Dowels
Petticoat
Accessories - veil, gloves, etc...
Optional, but handy - hot glue gun
Paint - white, peach, and red
Small Backpack
2-3 Yardsticks or Wooden Dowels
Petticoat
Accessories - veil, gloves, etc...
Optional, but handy - hot glue gun
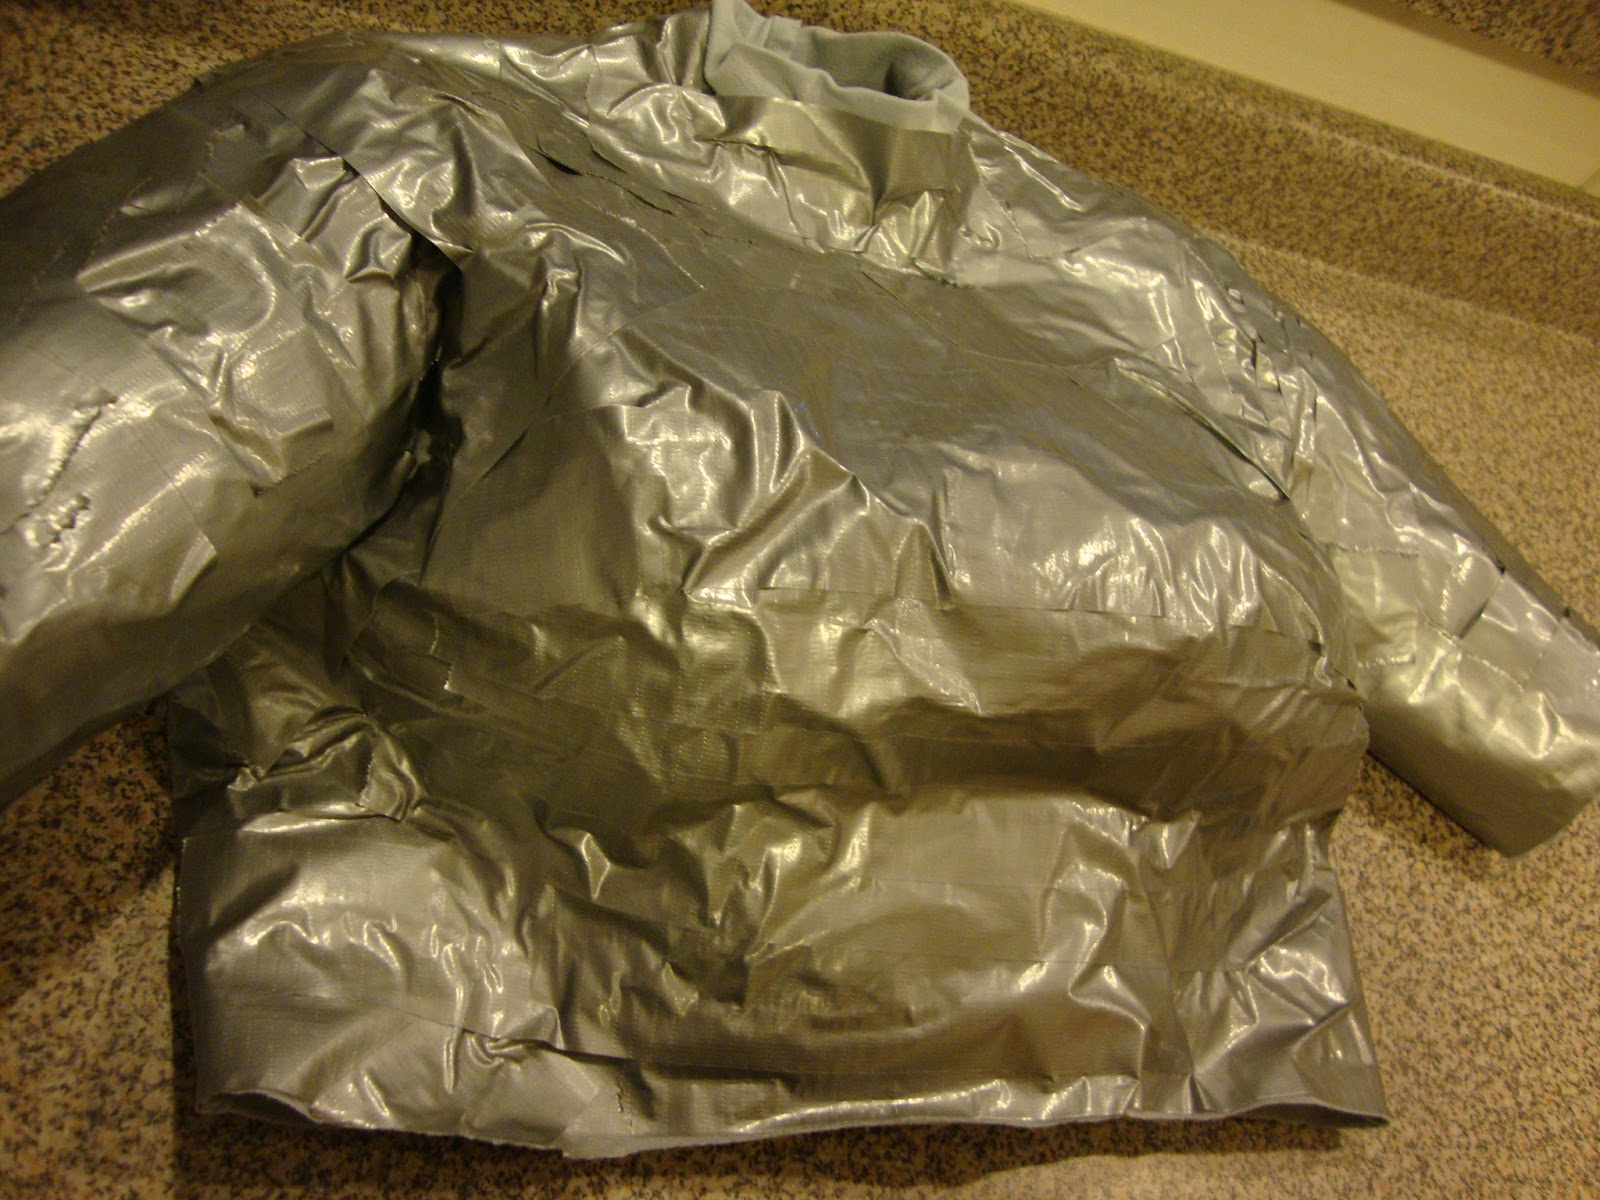
Step #2 - Tape the Torso
**Tip - Make sure that the torso you are taping fits the dress that it will be wearing.**
In my situation, I duct taped my sister's body because it better fit the wedding dress than my own. If you will be using your body as the torso you will need to grab a friend to help. You will need assistance either way.
I had my sister put on an old mock turtle neck. I wanted something that had longer sleeves and went higher up on the neck. This seemed to work well.
I cut strips of duct tape and taped her from the neck to navel and down to the elbows of the arms as smoothly as I could. If I could do this again, I would further down her forearms, which would help the gloves stay put better.
After the torso is well covered in duct tape you will need to cut if off by CAREFULLY cutting a vertical incision up the back through both the tape AND the shirt. Be very careful not to cut the skin, undergarments, hair, etc...
Once the body has been removed from the mold, carefully tape back up where the cut was made. Grab a round plastic container, such as a margarine container, that best fits the "neck hole" and make sure it is tight and secure as you tape it up. Crumple up some newspaper and stuff it to hold the form. I was able to rest the stuffed body on my small (empty and clean) bathroom garbage to stand upright which was beneficial.
Step #3 - Paper Mache the Body
Cut stripes of newspaper and stir up the paper mache mix 'cause you got a body to sculpt! My paste was approximately 1 part flour to 2 parts water. Layer it on as smooth as you can. The more layers you do, the more sturdy it will be. Allow ample drying time. More layers means a longer drying time. If you want to expedite the process, prop in front of a fan to speed up the drying process a little.

Step #4 - Paint the Body
I painted a basic white layer first, but you could still clearly see the newspaper print underneath. I used a flesh colored spray paint as a second and third coat and that was very fast and easy. I would definitely recommend spray paint. It did, however, eat through the base layer of paint in some spots. It looked like flesh rotting away. Ewww!
Let the paint completely dry.
Step #5 - Put the Body in the Dress
Self explanatory....
Step #6 - Prep the Backpack
This was the hardest step for me. It took a lot of trial and error to get it right.
Try inserting the poles into your backpack and then cut the yardsticks so your head will be where you want it to rest. Your head should fit under the bust and also be able to rest in the bride's hands. You will need your assistant again for this step. It will probably take a couple tries before the sticks are at the precise length. I attached 2 to the back side and 1 to the front-side of both the backpack and body because my paper mached body was a little weak. Once that is all set, duct tape the heck out of it to keep the sticks in place. Make sure the yardsticks are VERY secure in the backpack and the torso. You might have to remove some stuffing for this step. If the body is really stable you may be able to leave the stuffing out. Mine was a little flimsy so I opted to keep the stuffing in to make "her" more stable.
Step #7 - Cut the Head Hole
Cut an incision where your head will emerge through the dress. I cut the hole vertically, but think a horizontal cut might be a better way to go because you could see my "real" neck with the vertical cut. Use your own judgement. If there is a center seam you might want to use that as a guide.
Step #8 - Attach the Hands
I stuffed the gloves with floral wire and newspaper so they were filled out and bendable. I had to hot-glue the gloves to the paper mache arms to really get them to stay put. I also hot-glued more floral wire to the underside of the gloves to connect them together so the hands looked like they had a good grab on the head.
The costume is looking pretty good at this point.
Step #9 - The Final Touches
Now, time for the details.
I painted the top of the neck stub with a glossy red paint to look like blood. I then took a small dropper of the same paint and let some drips run down the neck. I even did some drops on the body where the "flesh was rotting away". Ewww!
In addition I painted the top to a soda bottle white and hot-glued it to the top of the neck stub to look like the spine sticking out. Super gross!
I would have loved to rig up a squirt gun to shoot blood out of the neck, but I ran out of time. Bummer!

Step #10 - Ready, Set, Go!!
Ok, the rest is up to you. Make yourself up with some spooky face make-up, veil, tiara, etc...
It is lightweight enough to wear all night. My dead bride did a lot of dancing.
Put on the petticoat and a white t-shirt underneath and the costume over and you are ready to scare the crap out of people.
Enjoy!


**Warning - Using the bathroom may prove to be difficult in this costume. Don't say I didn't warn you.**
Afterthoughts and Tips:
*Use a wedding dress with a high neckline and long sleeves for the easiest construction . Think 80's!*
*Don't take it easy on the paper mache step. Apply at least 3 layers*
No comments:
Post a Comment